01 · Getting around
How the theme editor works
Almost everything visual is edited in one place: the theme editor. Learn these few ideas once and the rest of the guide is easy.
- From your Shopify admin, open Online Store, then Themes.
- Find your theme in the list and click Customize. This opens the theme editor.
- The left panel is your controls. The large area on the right is a live preview of your store.
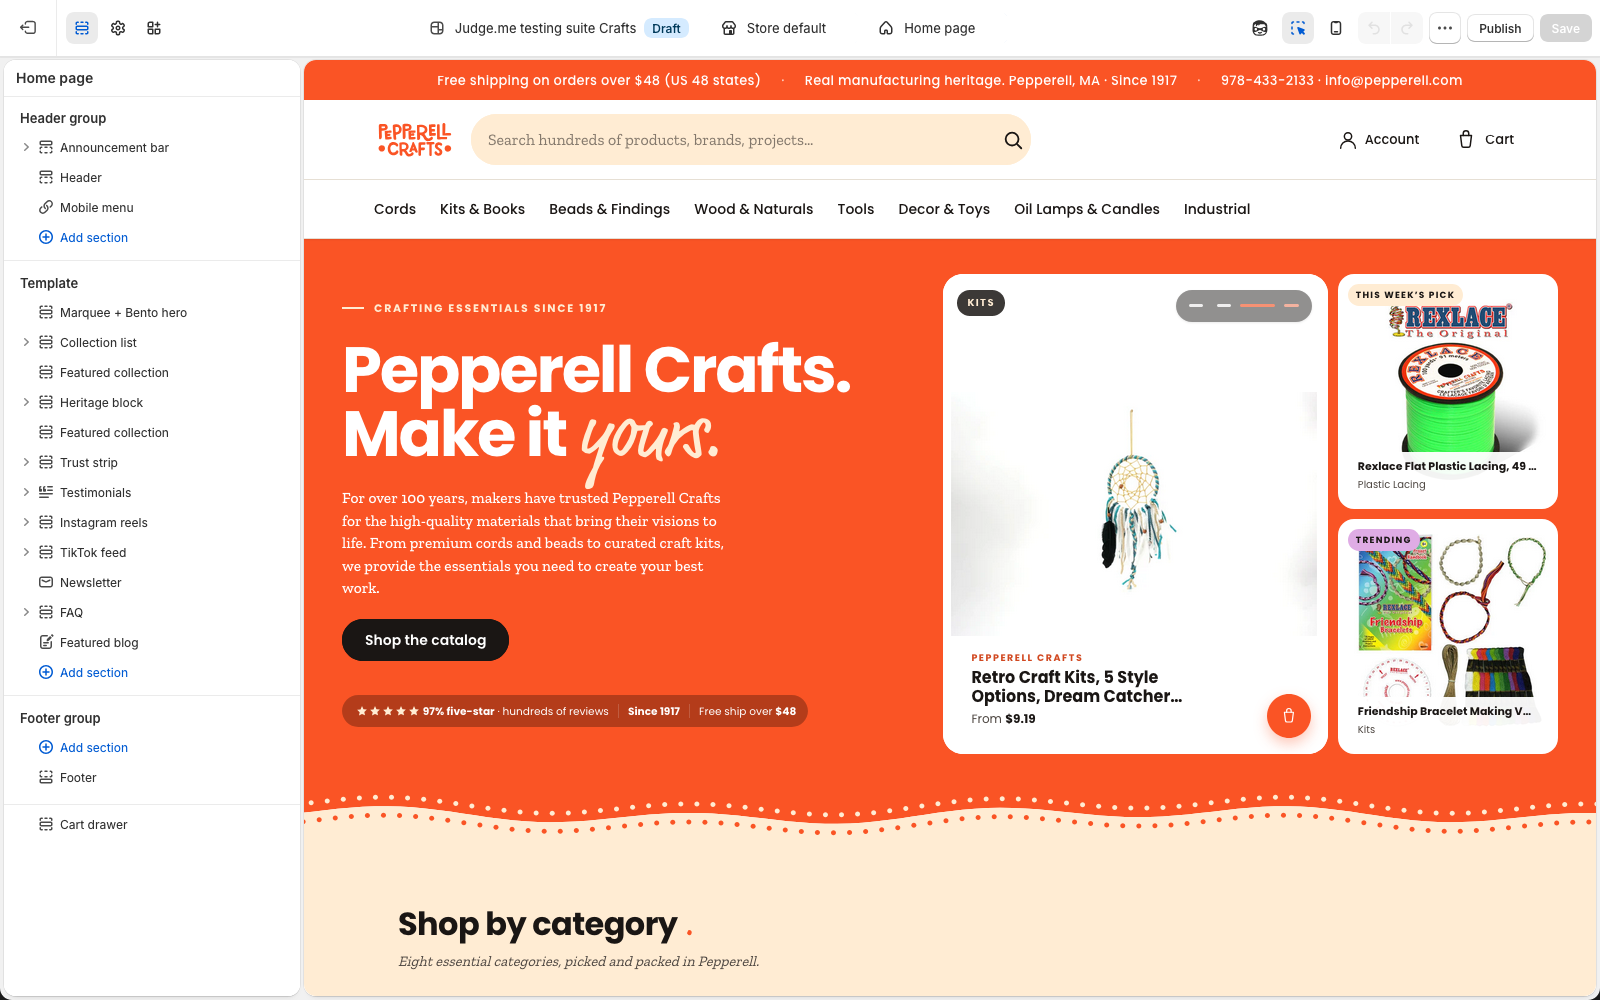
Sections, blocks, and settings
Your pages are built from sections stacked top to bottom (the hero, the category grid, best sellers, and so on). Click a section in the left panel to open its settings. Some sections also contain blocks, which are the repeatable items inside them, like each message in the top bar or each column in the trust strip.
Under most fields you will see a short grey line that explains what the field does and where it shows up on the store. We wrote these for you. When in doubt, read the helper text first.
Save, preview, publish
Changes you make are saved to the theme you are editing, but they do not go live until you publish that theme. So you can edit freely, look at the preview, and only publish when it looks right. Publishing is covered in the last chapter.
02 · Products
Adding a product and its craft fields
A product needs the usual basics, plus a few Pepperell fields that power your category pages, filters, and the specifications table.
The basics
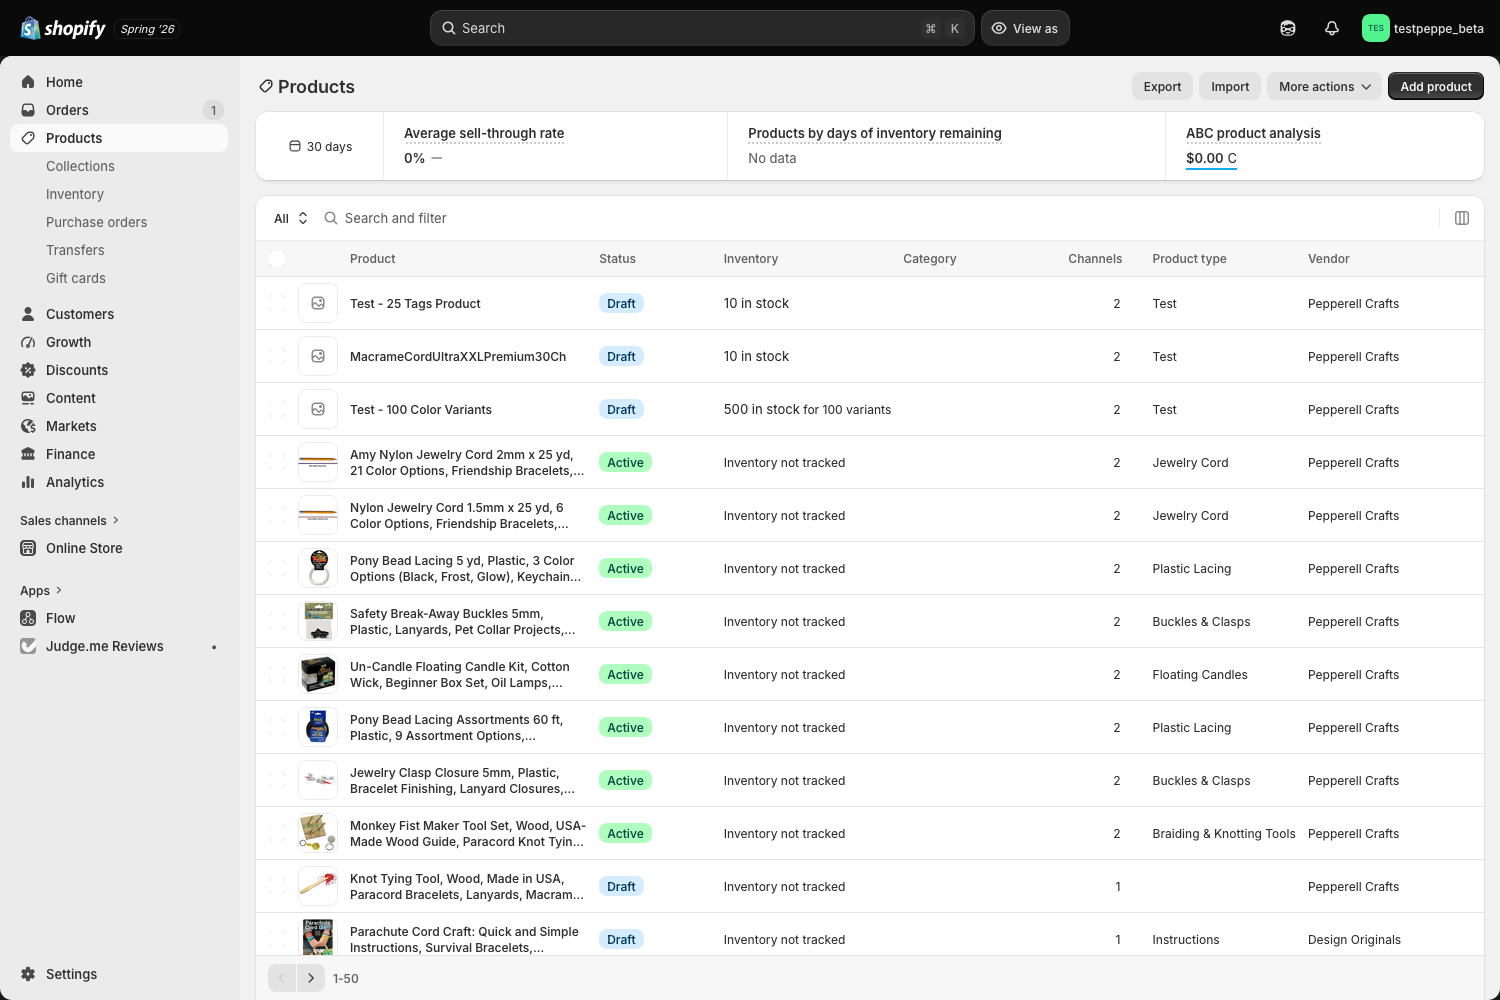
- In the admin, open Products, then click Add product.
- Fill in the Title and Description. Write the description the way a customer would want to read it.
- Under Media, upload clear photos. The first photo is the one shown on cards and at the top of the product page.
- Set the Price, and if the item comes in colors or sizes, add them under Variants.
- On the right, set Status to Active and make sure the Online Store sales channel is ticked so the product is visible.
The Pepperell craft fields
Scroll down the product page to the Product metafields card. These five fields are what make your store's category pages and filters work. Fill them in for every product.
| Field | What it does | How to fill it |
|---|---|---|
| Main category | Decides which of your eight category pages the product appears on. This is the most important field. | Type one of the eight values below, exactly. |
| Material | Shows in the specifications table and powers the material filter. | Pick one or more from the dropdown. |
| Skill level | Used on kits to show and filter by difficulty. | Pick Beginner, Intermediate, or Advanced. Leave blank for non-kit items. |
| Audience | Optional grouping, for example Kids or Adults. | Pick from the dropdown if it applies, otherwise leave blank. |
| Project | What the product is used to make, for filtering and discovery. | Pick one or more from the dropdown. |
Four of these five fields are dropdowns, so you choose from a set list and never worry about spelling. Main category is the exception: it is a typed field, because it also builds your category pages automatically, and Shopify does not let a field do both.
Type the category exactly as one of these, including the punctuation, or the product will not appear on its category page:
- Cords & Lacing
- Kits, Books & Patterns
- Beads, Findings & Closures
- Wood, Slates & Naturals
- Tools & Workshop
- Decor, Toys & Finished Pieces
- Oil Lamp & Specialty Candle Supplies
- Industrial Products
Product type: the subcategory
Separate from Main category, each product also has a Type, set in the Product organization card on the right of the product page. Type is the narrower subcategory, for example Paracord, Macramé Cord, Kits, or Fiberglass Wick. It powers the "Product type" filter that shoppers use to narrow down a category page.
When you start typing in the Type field, Shopify suggests the types you have used before. Pick an existing one where it fits, rather than inventing a new spelling for something that already exists, so the filter stays tidy.
Open a similar product that is already set up, copy how its fields are filled in, and match that. It is the quickest way to get Main category and Type right.
Adding a new option to a dropdown
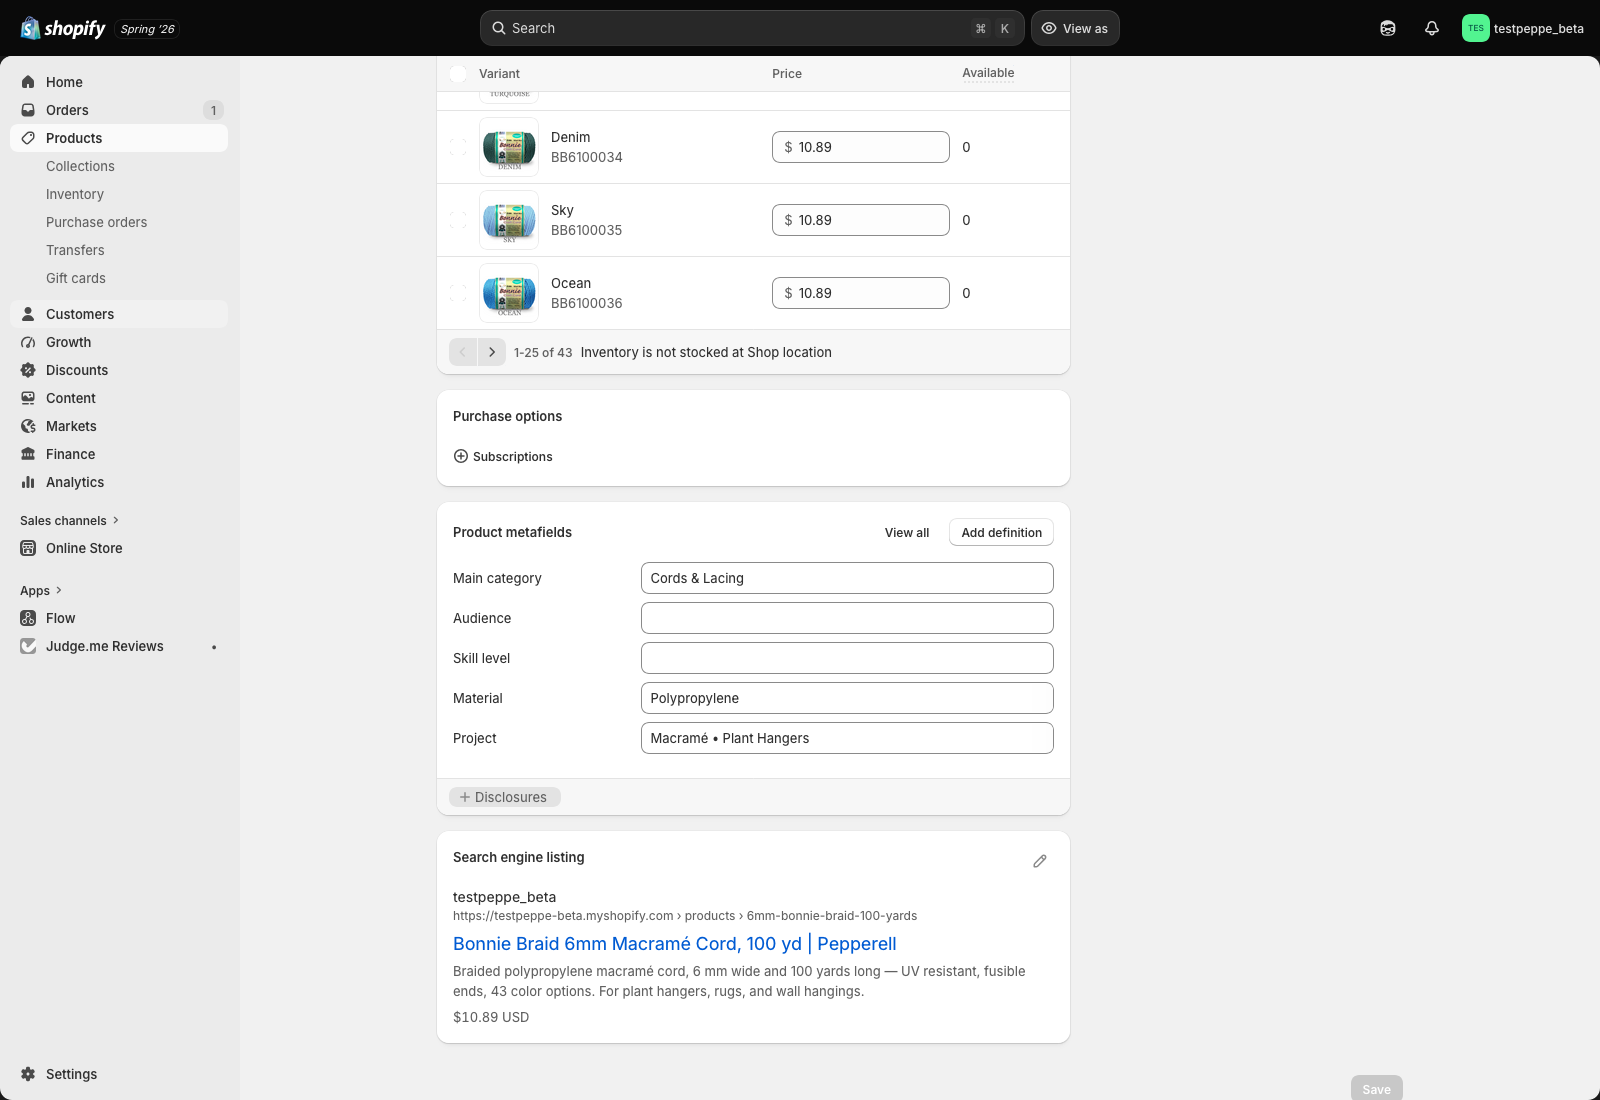
The dropdowns for Material, Project, Skill level, and Audience are typo-proof, and you can grow them yourself whenever a new one comes up. Open Settings, then Custom data, then Products, and click the field you want, for example Skill level. Under Validation you will see the list of choices; use Add item to add a new one and save. From then on it appears in the dropdown on every product.
03 · Homepage
Editing the homepage sections
Open the theme editor on the homepage and click any section to change its words, images, and buttons. Here is what each homepage section is for.
| Section | What you control |
|---|---|
| Announcement bar | The messages in the thin bar at the very top. Type [[amount]] in a message and it fills in your free-shipping amount automatically. |
| Marquee + Bento hero | The big opening headline, its buttons, the moving wall of products behind it, and the four small stats. |
| Shop by category | The grid of your eight category cards. |
| Featured collection | A row of products, used for Best sellers and for Kits. |
| Heritage block | Your story section with a photo and text. |
| Trust strip | The row of reassurances, for example returns and secure checkout. |
| Testimonials | The customer reviews heading and intro. |
| Featured blog | The latest posts from your blog. |
| TikTok feed | Your short videos. See chapter 06. |
Every field has helper text under it explaining exactly what it changes. For example, the hero's headline is split into three parts so one word can appear in the handwritten accent font.
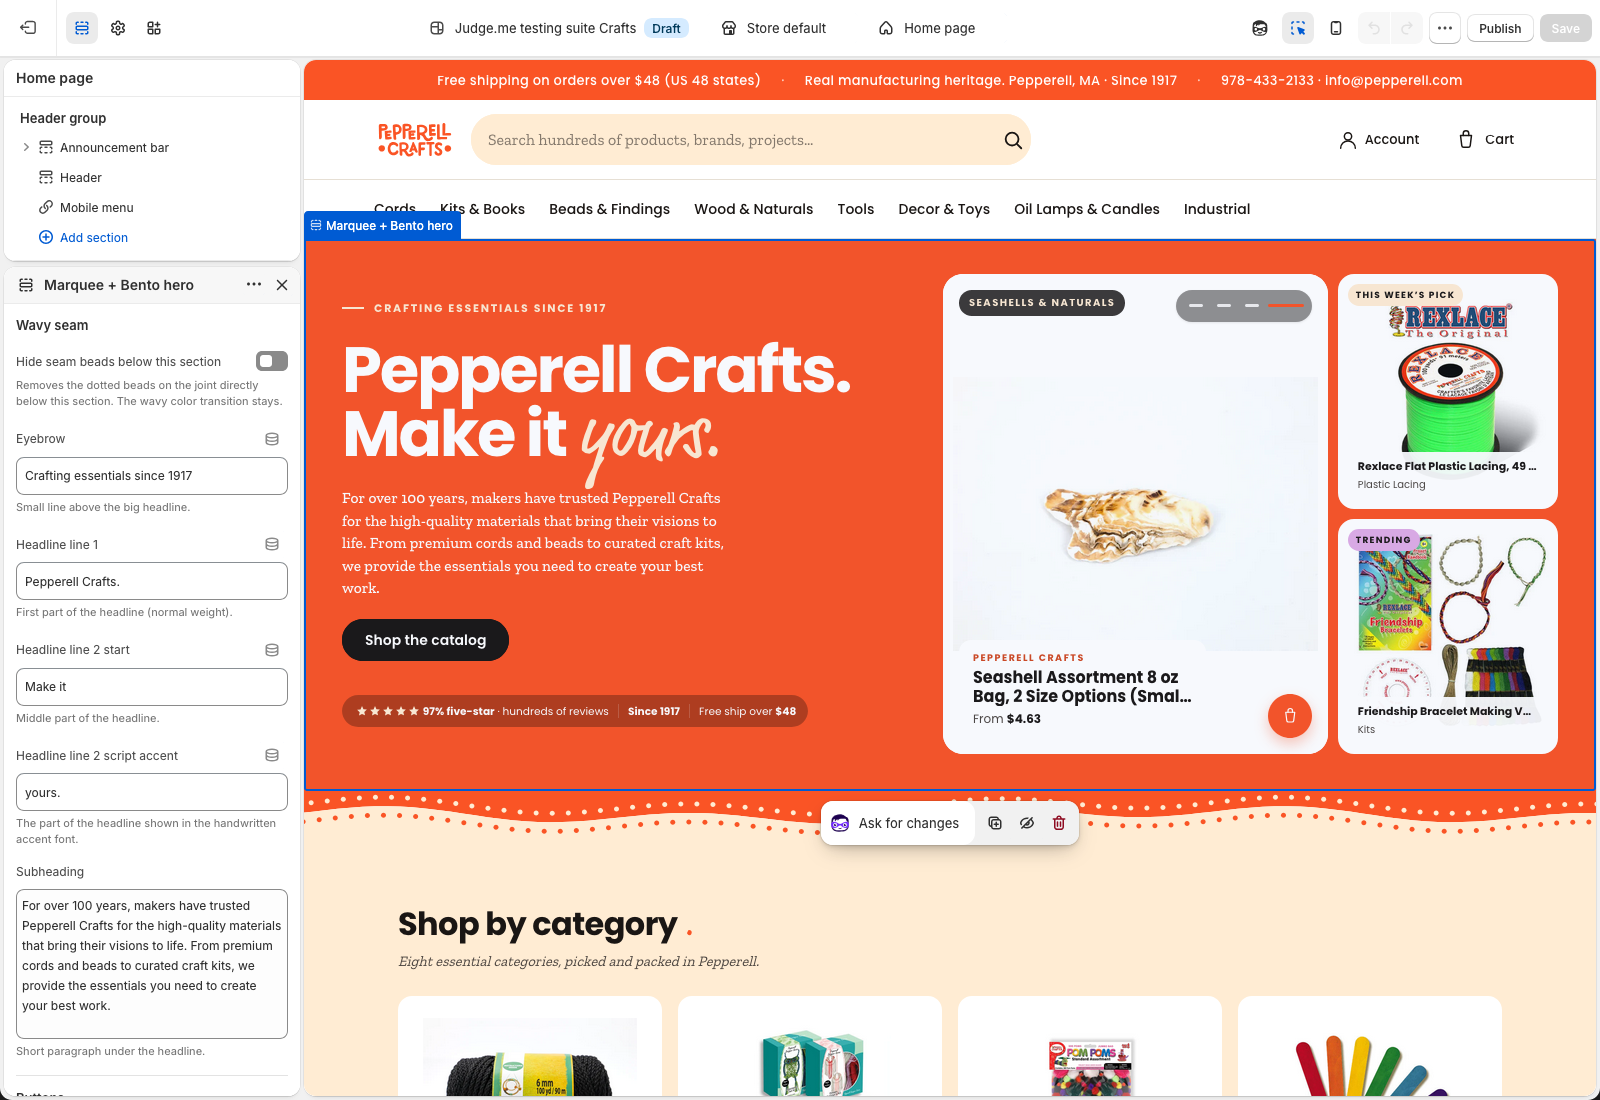
Choosing the products in the hero
The moving product wall in the hero is yours to set. Open the hero section and either pick a Collection to pull from, or use the Product handles field to hand-pick exact products by handle, separated by commas. Leaving the handles blank falls back to the collection. The alternate wall-style hero has three rows, each with its own collection and product-handles field, so you can feature a different set in each row.
Many sections have two tick boxes near the bottom: one hides the small dotted beads on the wavy edge above the section, the other hides the faint background doodle. Use them if a section feels too busy.
04 · Product rows
Best sellers and product rows
The Best sellers and Kits rows on the homepage are both the Featured collection section. You choose which products show, in what order.
- In the editor, click the Featured collection section you want to change (Best sellers or Kits).
- To show a whole collection, pick it under Collection.
- To hand-pick exact products, use Product handles: type each product's handle, separated by commas, in the order you want them.
- Set How many products to display, and choose the small Badge shown on each card (brand, skill level, or none).
A handle is the end of a product's web address. If the product page is /products/6mm-bonnie-braid-100-yards, the handle is 6mm-bonnie-braid-100-yards. To show a specific photo, add a colon and the photo number, for example 6mm-bonnie-braid-100-yards:3.
05 · Collections
Collections and the eight categories
Your eight category pages fill themselves automatically. A product joins a category the moment you set its Main category field.
You do not add products to a category by hand. Each category is a smart collection that gathers every product whose Main category matches. So the way to move a product between categories is to change that one field on the product (chapter 02).
Editing a category's look
- In the admin, open Products, then Collections.
- Click the category you want to change. Here you can edit its title, description, and the image used on the homepage card.
- Leave the Conditions alone. They are what keep the category filled automatically.
They are wired into the navigation and the homepage. You can rename them and change their images, but deleting one will leave gaps on the site.
07 · Brand
Colors, fonts, and store details
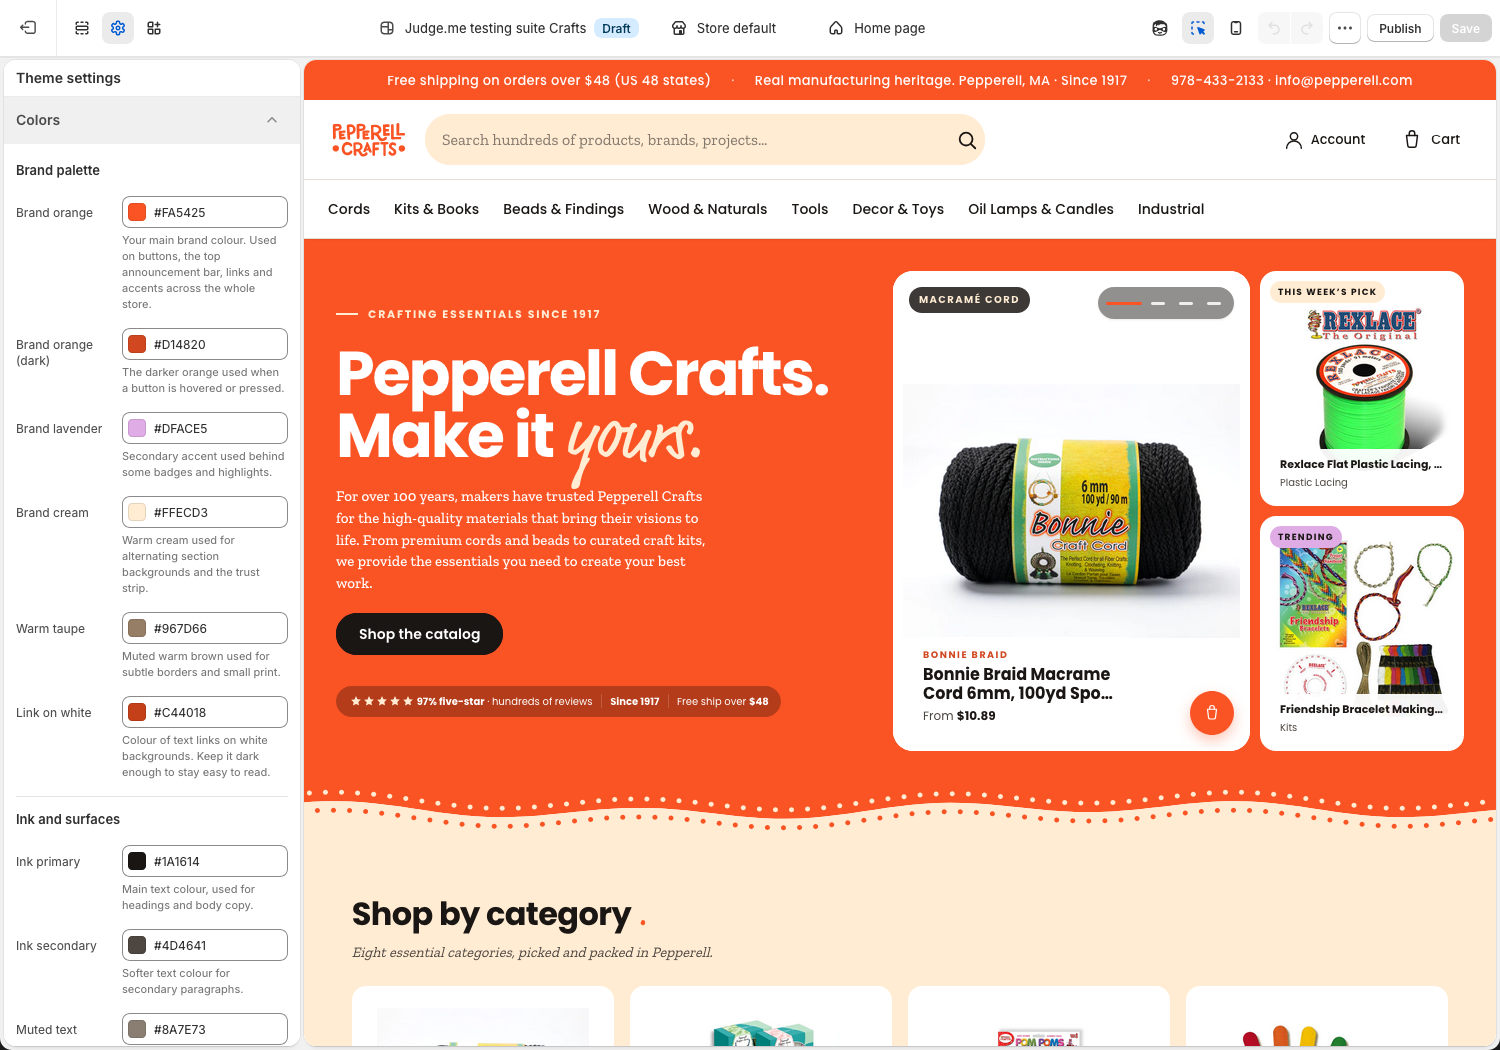
Store-wide choices live in one place. In the theme editor, click the gear icon for Theme settings.
| Group | What's inside |
|---|---|
| Colors | Your brand orange, cream, and text colors. The main orange drives buttons, the top bar, and links across the whole store. |
| Typography | The heading and body fonts, and a slider to make all text a little larger or smaller. |
| Cart | Whether adding to cart opens a drawer or a full page, and your free-shipping amount. Change it in one place here and it updates everywhere, including the top bar. |
| Social links | Your Instagram, Facebook, YouTube, Pinterest, and TikTok links. A blank field hides that icon. |
| Store details | Your public phone number, email, and short location line, shown in the footer and contact areas. |
| Product display | Optional switches for badges, gift wrapping, delivery estimates, and which specification rows to show. |
The free-shipping amount is a good example of how the theme avoids surprises. You set it once under Cart, and the top bar, the cart progress bar, and the product page all read from it.
08 · Reviews
Customer reviews (Judge.me)
Reviews are handled by the Judge.me app. They appear on each product page and as star ratings on product cards.
- To read and reply to reviews, open the Judge.me Reviews app from the Apps menu in your admin.
- Star ratings on product cards and product pages update on their own as real reviews come in. A product with no reviews yet simply shows a "Be the first to review" link.
- The review colors already match your brand orange. You do not need to change anything for the look.
What is included
Your setup gives you the two pieces that matter most. The full reviews widget sits near the bottom of every product page, and the small star summary sits by the price and on every product card. Both are already styled to your brand and need no setup from you.
You may recognize the customer questions and answers module from the design you reviewed, where a shopper posts a question on a product for you or other customers to answer. Judge.me keeps that feature behind a paid plan, so turning it on would mean a paid Judge.me subscription. Unless you consider it essential, we can leave it aside, and the review features above are fully included and work without it.
Approving reviews before they appear
You can decide whether a new review goes live on its own or waits for you to approve it first. Both are fine. Manual approval gives you a last look before anything shows on the store. You control this from the Judge.me app.
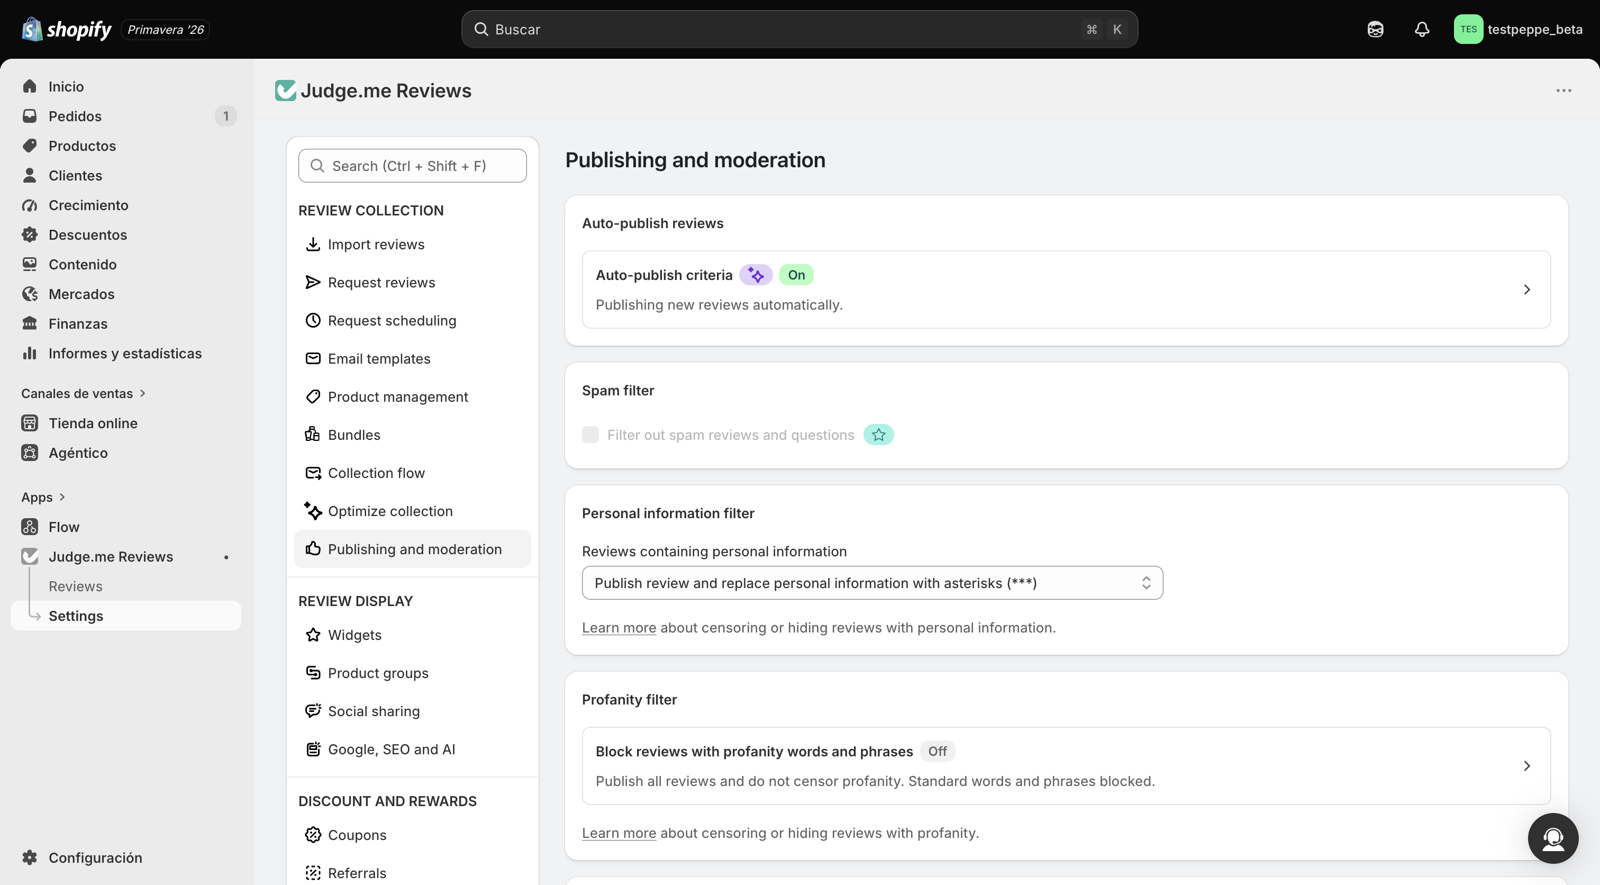
- Open the Judge.me Reviews app, then click Settings.
- Under Review collection, choose Publishing and moderation.
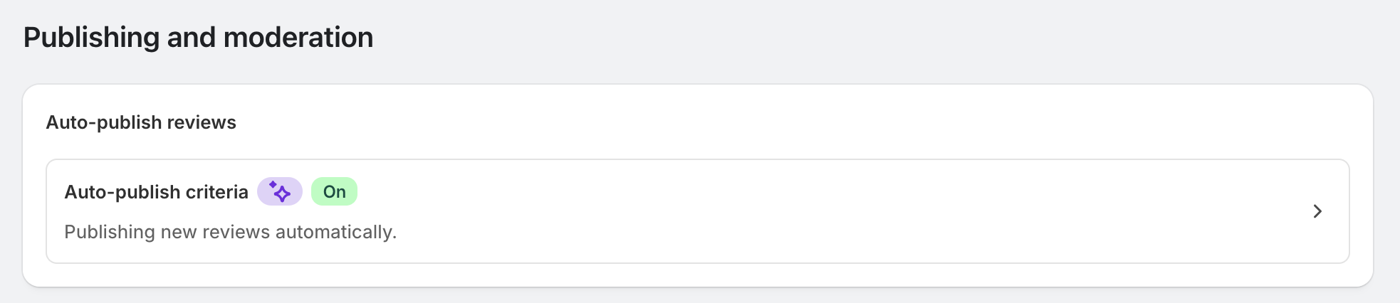
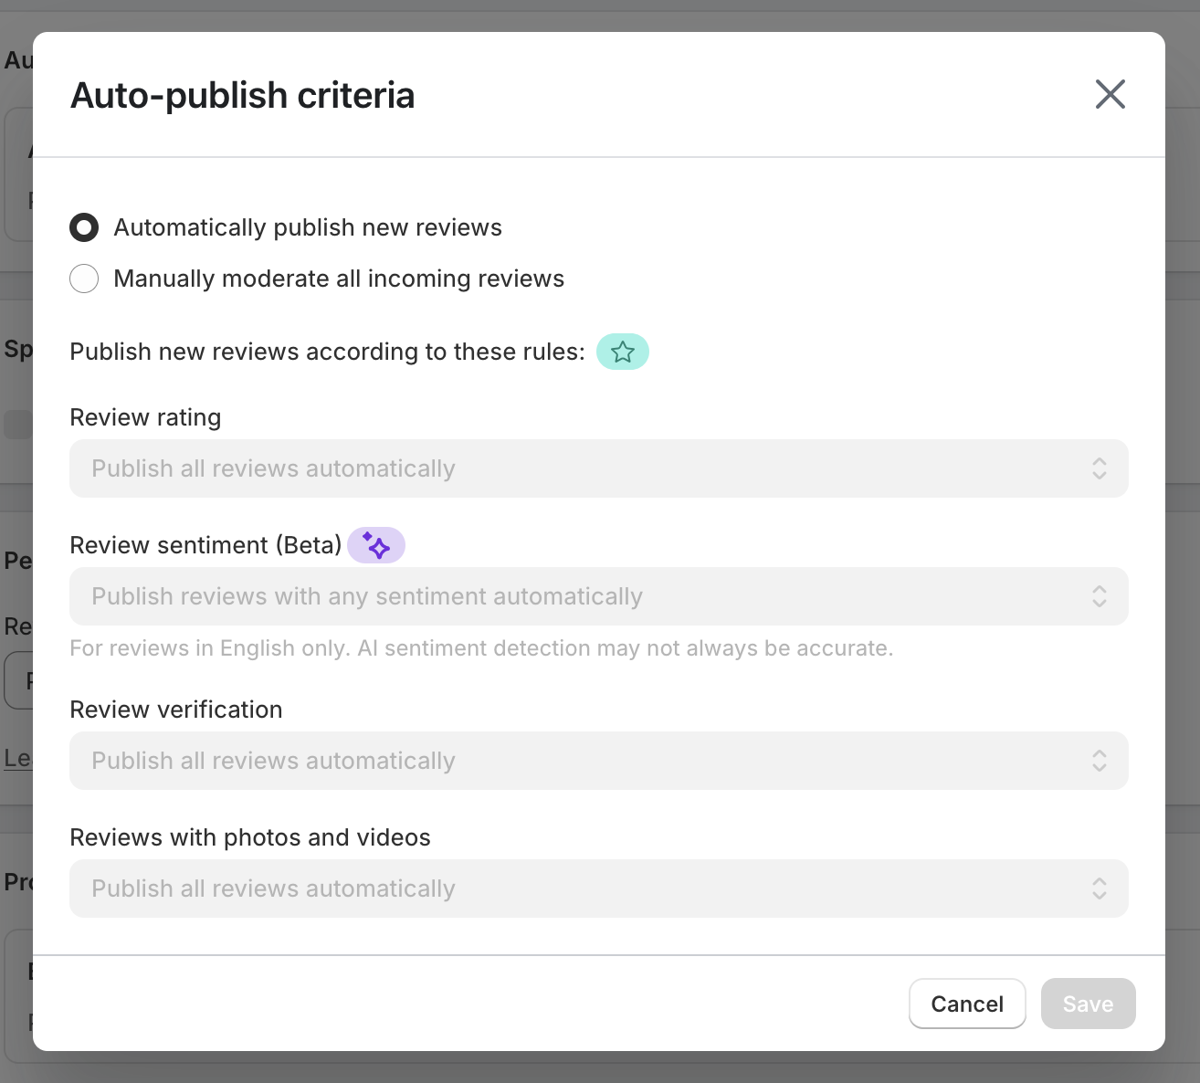
- Open the Auto-publish criteria card at the top.
- Choose Automatically publish new reviews to let them appear right away, or Manually moderate all incoming reviews to approve each one yourself first. Click Save.
With manual moderation on, a new review waits in the app until you approve it, so nothing reaches a product page without your say-so. You can switch between the two settings at any time.
The full reviews list is near the bottom of every product page. The small stars near the price and on product cards are a short summary of the same reviews.
09 · Pages
Pages and policies
Text pages like FAQ, Shipping & Returns, and Contact are edited in two ways, depending on the page.
- Question-and-answer pages (FAQ, Shipping details) are built from blocks in the theme editor. Open the page's section and edit each question and answer, or add a new one.
- Plain text pages are edited under Content, then Pages in the admin, using the normal text editor.
- Store policies (privacy, terms, refund) are edited under Settings, then Policies.
If you change a fact like the returns window or the free-shipping amount, update it wherever it appears: the FAQ, the Shipping page, and the theme settings. The manual's chapters point you to each spot.
10 · Going live
Previewing, publishing, and staying safe
Nothing you edit is live until you publish. This is your safety net, so use it.
Preview first
While editing, the right side of the theme editor is a live preview. To see the full store as a shopper would, use the Preview option from the theme's actions. Look at the homepage, a product page, and a category page before you publish.
Publish when ready
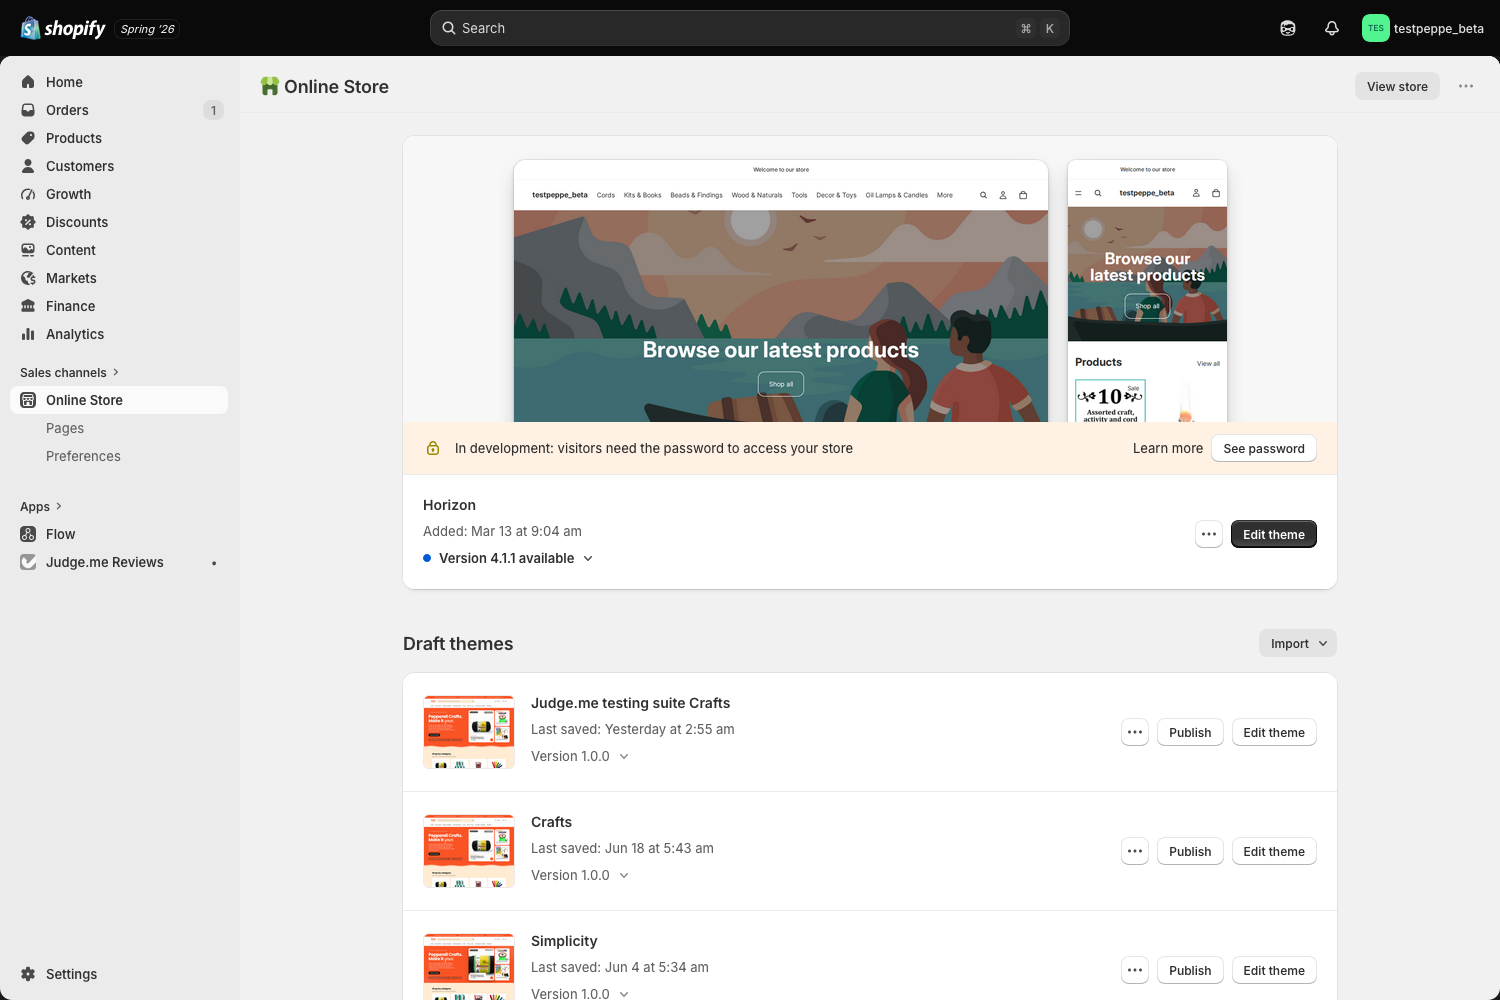
- In the admin, open Online Store, then Themes.
- Find your theme and click Publish. This makes it the live store for everyone.
These keep the store working. Avoid them unless you know what you are doing, or ask your developer first.
- Do not delete the eight category collections.
- Do not change a category's Conditions. That is what fills it automatically.
- Do not change a product's handle after it is live, or its links stop working.
- Leave the Feed source settings on the TikTok and Instagram sections as they are.
- When unsure, duplicate the theme first, edit the copy, and publish only when happy.
What never changes, and what is always reversible
The reassuring part. Whatever you edit in here, the parts of your store that matter most are left alone, and any change can be undone.
- Your orders, your customers, and their accounts stay exactly where they are.
- Checkout, payments, and your web address are untouched.
- Every customer review you already have stays in place.
- Publishing a theme is one click, and switching back to a previous one is one click.
- The Pepperell craft fields sit next to your existing product data, which stays exactly as it is.
11 · Next steps
Next steps
Here is what happens from here, and what we need from you.
- Review the theme. We have uploaded a copy of the new theme to your store. Go to Online Store, under Sales channels, and you will find an unpublished theme called Crafts - Testing. Click around and get a feel for it.
- Keep in mind that copy and product info are not updated yet. This preview shows the new look and feel: the layout, styling, and navigation (the "clothes"), but not your updated copy, product descriptions, or content (the "body"). That still lives on your current site and gets swapped in during migration. So if something looks off or does not match, that is why. Nothing is broken.
- Approve it, or send us notes. Let us know if anything needs adjusting.
- Tell us you are ready. We are happy to answer questions either way in the meantime, by email or a quick call.
- We schedule go-live. Once we get the green light, we lock in a date. The full migration happens in a single day, so there is no extended downtime to plan around.
06 · Social
TikTok and Instagram
The homepage can show your latest short videos and posts. Both sections have a simple on and off switch, and both let you choose exactly what appears.
TikTok is the only one of the two that plays video right on your homepage, so a shopper can watch without leaving the store. Instagram shows only a still image, and a tap opens Instagram's own website in a separate place, which pulls the shopper away from your products. Keeping people watching on the spot, inside the store, is the version that tends to turn browsing into orders, so we recommend giving TikTok the spotlight and treating Instagram as a supporting link.
TikTok
You add each video yourself. Add a block for each one and paste that video's share link. TikTok has no automatic "latest from my account" feed, so the videos shown are exactly the ones you add here, in the order you add them. Leave the Feed source setting as it is.
Instagram
The Instagram section works the same way: your username, your profile link, a show or hide switch, and a block for each post. Because Instagram only shows a still preview that links out to its website, it works best as a small gallery that points people to your profile. If a live feed cannot load, the section shows a friendly button to your profile instead. Instagram also has an optional way to pull your latest posts in automatically through a service called Behold, but that is a one-time advanced setup, so leave the Feed source and Behold fields as they are unless it has been set up for you.
Both sections show exactly the links you paste in, and only those. They do not update by themselves when you post something new. So when a season or a campaign changes, open the section and swap the video and post links by hand to match what you want on the homepage that month. It takes a minute, and it keeps the feed feeling current.